
Getting Started: How to Set Up the NOMA iQ™ App
Follow these four simple steps to get your device set up with NOMA iQ™ products.
Download the NOMA iQ™ App
Download the NOMA iQ™ app from the App Store or Google Play to your mobile device. Launch the app and register using your email address. Create a password, then login to the app or login if you already have an account.
Network & System Requirements
Verify your network and ensure your mobile device is connected to a 2.4 GHz Wi-Fi channel. No hub required. Mobile devices must have iOS 13.0 or higher/Android 8 or higher operating systems.
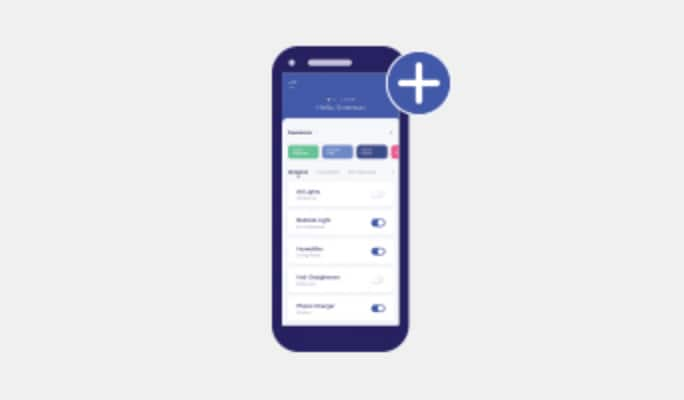
Add a Product
Install your smart product and make sure to enable and give permission for Bluetooth and Location Services on your mobile device. In the NOMA iQ™ app, select the "+" symbol in the top right-hand corner. Select your smart product and follow the instructions within the app.
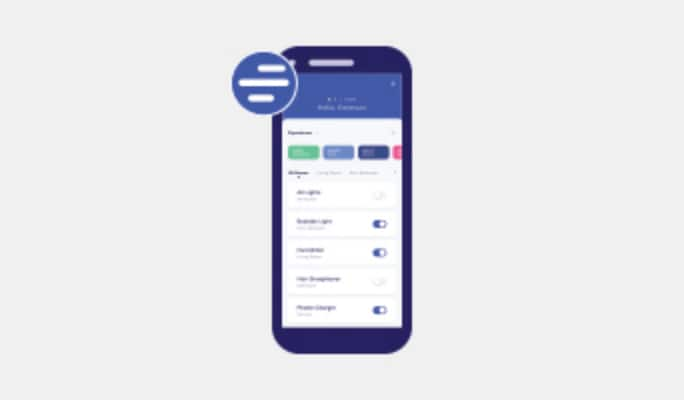
Set Up Your Voice Assistant
Go to the menu at the top left corner of the app and select "Voice Assistants." Choose your voice assistant and follow the instructions.
NOMA iQ™ Troubleshooting Videos
Need help setting up your device? Watch these videos to help guide you through your connections and set up.
How to Configure Your Wi-Fi Network and Device for NOMA iQ™
How to Sync Google Assistant with NOMA iQ™
How to Sync Amazon Alexa with NOMA iQ™
How to Create, Edit or Delete a NOMA iQ™ Experience
How to Create, Edit or Delete NOMA iQ™ Device Groupings
Frequently Asked Questions
GENERAL
- Download the NOMA iQ™ app from either the Google Play store or the Apple store
- Open the app and you will be prompted to create an account. Input your email, name, and create a password. A confirmation will then be sent to your email
- Once you confirm your account through the email link, log into the NOMA iQ™ app where you can then name your Household and enter your postal code (this is optional for weather conditions in your area)
- Confirm your time zone and you’re ready to go!
- Click the ‘Menu’ icon at the top left corner of the app
- Click ‘Account’ and scroll down to click ‘Change Password’
- Put in your ‘Current Password’, then add your new password, confirm, then hit save
- In the Home page, select the device you want to restore to factory settings.
- Click on the ‘Menu’ icon
- Scroll down and click on ‘Delete’
- Click ‘Restore Factory Settings’ (back to pairing mode)
- After clicking ‘Confirm,’ the device will be removed from the app and return to pairing mode
- Go into the Menu click ‘Account’
- Scroll to the bottom, click Delete ‘Account’ and confirm
ROUTER/ Wi-Fi
- On your mobile device go to Settings > Wi-Fi
- Look for your Wi-Fi network. If you see two or more networks, one of them may be a 2.4GHz band. 2.4GHz network names may end with 2.4 or 2.4G. (For example: "Home Wi-Fi 2.4GHz“). 5GHz network names may end with 5, 5G.
- If you don't see any network name associated with 2.4 or 5, you need to log in to your Wi-Fi router. Please refer to your router manual/documentation.
- In the Apple Store, download the app ‘AirPort Utility’
- In the AirPort Utility app, click on ‘Settings’
- Turn on ‘Wi-Fi Scanner’ and all the detected networks will appear in the menu
- Check the channel:
• Channel 1 – 13 band means you are on 2.4GHz
• Channel 13+ band means you are on 5GHz
- Enter the phone's ‘Settings’ page
- Tap ‘Network and Internet’
- Go into your connected Wi-Fi settings by tapping the settings icon
- Under ‘Frequency’ you can see what channel your phone is currently detecting
- Make sure your mobile device is running iOS 12.5 or higher / Android 7.1 or higher
- Verify your network and ensure your mobile device is connected to a 2.4 GHz Wi-Fi channel
- Install your smart product and make sure Bluetooth is enabled on your mobile device
- Login to the NOMA iQ™ app, select the “+” symbol on the top right-hand corner
- Select your smart product and follow the instructions within the app
- Make sure your mobile device is running iOS 12.5 or higher / Android 7.1 or higher
- Verify your network credentials and ensure your mobile device is connected to a 2.4 GHz Wi-Fi channel
- Make sure Bluetooth is enabled on your mobile device
- Make sure your NOMA iQ™ device is connected to power, turned on, and is in pairing mode
If you’re still having issues, please contact us at info@nomaiq.com
BASIC DEVICE SET UP
- Click the ‘+’ sign in the top right corner of the main page of the app
- The app will then scan for available products to pair – select the product you wish to pair and then input the password for your2.4GHz Wi-Fi network
- Ensure that your NOMA iQ™ device is powered and in pairing mode (lights are flashing) before proceeding
- Follow the rest of the instructions via the app for product set-up
- In the Home page, select the device you want to remove
- Scroll down and click on ‘Delete’
- Click on ‘Confirm’ and the device is now removed from your account
- Launch the Amazon Alexa App
- Click on the Menu icon
- Click on ‘Skills & Games’
- Click the Search icon
- Search for ‘NOMA iQ™’
- Click on ‘Enable to Use’
- Enter your NOMA iQ™ credentials and tap ‘Link Now’
- Click ‘Authorize’
- Click ‘Done’
- Click ‘Discover Devices’
- Use voice command, “Alexa, discover devices” to find your NOMA iQ™ devices
- Click ‘Set Up Device’ to set up your device
- Click ‘Done’
- The NOMA iQ™ account is now linked to Amazon Alexa
- Launch the Google Home app
- Tap the “+” button on the top left corner and tap ‘Set Up Device’
- Tap ‘Works with Google’ and search for ‘NOMA iQ™’
- Enter your NOMA iQ™ credentials to sign in
- Tap ‘Authorize’ to complete the account linking process
- If successfully integrated, you will see ‘NOMA iQ™ is linked’
- Google Assistant is now synced with the NOMA iQ™ app
- Click the ‘+’ sign to the right of ‘Experiences’ on the home page
- Pick what device(s) you want to include
- Pick what you want that device to do
- Pick what will trigger the experience
- Give your Experience a name and add a colour if you have a shortcut
- Go to the ‘Experiences’ tab from the Home page
- Click the pencil icon next to the Experience you wish to edit.
Actions will run at the specified time on the specified day.
Example: Lights will turn on at 9pm every weekday.
Countdown Trigger
Actions will run at the end of a countdown which starts when you click the relevant shortcut.
Example: Lights will turn on 5 minutes after pressing the “Lights on” shortcut.
Sunrise/Sunset Trigger
Actions will run at Sunrise or Sunset; whatever time that is, based on location and the time of year.
Example: Lights will turn on at Sunset. In June, that will be 8pm, in December that will be 4pm.
Shortcut Trigger
Action will execute when the relevant shortcut is clicked.
Example: Lights will turn on when I press the “Lights on” Shortcut.
Schedule Trigger
Actions will run at the start time on the specified days. At the end time, devices will return to their prior state.
Example: Lights will turn on at 9pm every Friday and revert to what they were before at 12pm the next day.
Note: At the end of a Schedule Experience, included devices will revert to the state they were in when the Experience was created. For best results, please ensure that your devices are in the desired ‘end state’ when you build the Experience. Example: If I want the lights to turn on at 9pm and off at 11pm, the lights should be off when creating the Experience.
- In the Home page, select one of the devices you want to create a group with
- Click on the Menu icon
- Click on ‘Device Grouping’
- Select the devices you want to group and click on ‘Confirm’
- Enter a Group Name
- Click on ‘Save’
- The Device Group is now created
- The new group can be found in the Home page
- In the Home page, select the Menu icon
- Click on ‘Members,’ then add member
- You will be prompted to add a device before sharing. If there are no devices in the Household, you will not able to share.
- Ask your friend/family member to download the NOMA iQ™ app and sign up for an account
- Ensure they choose ‘Join a Household’
- Once they’ve tapped ‘Join a Household,’ return to your NOMA iQ™ app and click ‘Next’
- The devices in the Household are now shared
PRODUCT SET-UP: Light Bulb/Light Strip
- Verify your Wi-Fi network and ensure your mobile device is connected to a 2.4 GHz Wi-Fi channel
- Install your smart light bulb in a light fixture and turn the light fixture ON
- If the bulb is flashing, continue to step 4. Otherwise set it to pairing mode by cycling the light ON/OFF about 4-5 times with 1-2 second intervals in between ON and OFF.
- Make sure Bluetooth and Locations Services is enabled on your mobile device
- In the NOMA iQ™ app, select the ‘+’ symbol on the top right-hand corner to add the device
- Select the smart light bulb and follow the prompts in the app
- Verify your Wi-Fi network and ensure your mobile device is connected to a 2.4 GHz Wi-Fi channel
- Plug in your smart light strip and turn it ON
- If the light strip is flashing, continue to step 4. Otherwise set it to pairing mode by pressing and holding the power button for 3-4 seconds until it starts flashing.
- Make sure Bluetooth and Locations Services is enabled on your mobile device
- In the NOMA iQ™ app, select the “+” symbol on the top right-hand corner to add the device
- Select the smart light strip and follow the prompts in the app
- In the Home page, select the smart bulb/ light strip you want to restore to factory settings
- Click on the Settings icon
- Scroll down and click on 'Delete Device'
- Select 'Confirm'
- The device is now removed and in pairing mode
1. Install your NOMA iQ™ smart light bulb into the fixture you wish to use it in.
2. Turn on the light on for 1 second and off for 1 second, 5 times.
3. Your light bulb will flash on and off to indicate it’s in pairing mode
4. Open the NOMA iQ™ app on your mobile device and click the plus ‘+’ icon at the top right corner of the home screen to pair the device
1. Connect the power cord to the corresponding port on the controller
2. Connect the light strip to the square connector on the controller
3. Plug the power cord into an electrical outlet
4. Press and hold the button on the controller for 3-4 seconds
5. The light strip will flash on and off to indicate that it’s in pairing mode
6. Open the NOMA iQ™ app on your mobile device and click the plus ‘+’ icon at the top right corner of the home screen to pair the device
PRODUCT SET-UP: Power Bar/Wall Plug/Outdoor Plug
- Verify your Wi-Fi network and ensure your mobile device is connected to a 2.4 GHz Wi-Fi channel
- Plug in your smart power bar and turn it ON
- If the indicator light is flashing, please skip to step 4. Otherwise, to put the device into pairing mode, press and hold the power button for plugs (reset button for power bar) for 3-5 seconds until the light starts flashing.
- Make sure Bluetooth and Location Services is enabled on your mobile device
- In the NOMA iQ™ app, select the “+” symbol on the top right-hand corner to add the device
- Select the smart power bar/plug and follow the prompts in the app
- Unplug the wall plug/outdoor plug for 10 seconds
- Plug the unit back in and check to see if the power indicator turned on
- Also try moving the wall plug/ outdoor plug to other outlets to see if the indicator light turns on
- Plug your NOMA iQ™ smart wall plug into an electrical outlet
- Press and hold the power button on the side of the plug for 3-5 seconds
- The power button will flash on and off to indicate the device is in pairing mode
- Open the NOMA iQ™ app on your mobile device and click the plus ‘+’ icon at the top right corner of the home screen to pair the device
- Plug your NOMA iQ™ smart outdoor plug into an electrical outlet
- Press and hold the power button for 3-5 seconds
- The indicator light will flash on and off to indicate the device is in pairing mode
- Open the NOMA iQ™ app on your mobile device and click the plus ‘+’ icon at the top right corner of the home screen to pair the device
- Plug your NOMA iQ™ smart power bar into an electrical outlet
- Press the switch to turn on the power bar and the power indicator light will also illuminate
- Press and hold the reset button for 3-5 seconds
- The indicator light will flash on and off to indicate the device is in pairing mode
- Open the NOMA iQ™ app on your mobile device and click the plus ‘+’ icon at the top right corner of the home screen to pair the device
PRODUCT SET UP: Air Purifier
- Verify your Wi-Fi network and ensure your mobile device is connected to a 2.4 GHz Wi-Fi channel
- Plug in your smart air purifier and turn it ON
- Press and hold the power and Wi-Fi button until you hear 5 consecutive slow beeps to put it into pairing mode
- Make sure Bluetooth and Location Services is enabled on your mobile device
- In the NOMA iQ™ app, select the ‘+’ symbol on the top right-hand corner to add the device
- Select the air purifier and follow the prompts in the app
- For further troubleshooting, please refer to the manual
- Plug your NOMA iQ™ smart air purifier into an electrical outlet
- Press and hold the power and Wi-Fi buttons simultaneously until you hear 5 beeps
- The Connected icon will flash on and off to indicate the device is in pairing mode
- Open the NOMA iQ™ app on your mobile device and click the plus ‘+’ icon at the top right corner of the home screen to pair the device
GROW BULBS
Yes.
Yes.
Dual Spectrum means that the light has two modes and is capable of providing the necessary spectrum for the growing stage along with the flowering stage.
Dual Spectrum means that the light has two modes and is capable of providing the necessary spectrum for the growing stage along with the flowering stage.
The light modes are Growing and Flowering. The Growing mode produces light focused in the blue spectrum and is used by plants during their growing and vegetative periods. The Flowering mode produces light focused in the red spectrum, which will help encourage flowering and fruiting of your plants.
1. Verify your Wi-Fi network and ensure your mobile device is connected to a 2.4 GHz Wi-Fi network.
2. Install your smart grow light bulb in a light fixture and turn the light fixture ON.
3. If the bulb is flashing, continue to step 4. Otherwise set it to pairing mode by cycling the light ON/OFF about 4-5 times with 1-2 second intervals in between ON and OFF.
4. Make sure Bluetooth® and Locations Services are enabled on your mobile device.
5. In the NOMA iQ™ app, select the (+) symbol on the top right hand corner to add the device.
6. Select the smart grow light bulb and follow the prompts in the app.
1. Verify your Wi-Fi network and ensure your mobile device is connected to a 2.4 GHz Wi-Fi network.
2. Plug your smart grow light into an outlet and turn the light switch ON.
3. If the light is flashing, continue to step 4. Otherwise set it to pairing mode by cycling the switch ON/OFF about 4-5 times with 1-2 second intervals in between ON and OFF.
4. Make sure Bluetooth® and Locations Services are enabled on your mobile device.
5. In the NOMA iQ™ app, select the (+) symbol on the top right hand corner to add the device.
6. Select the smart grow light and follow the prompts in the app.
You can connect up to 7 units together. Maximum length should be 5' (1.5 m) or less.
The A19 bulb has a beam angle of 150 degrees, while the BR30 has a beam angle of 110 degrees. A beam angle of a lamp is the angle at which the light is distributed or emitted.
Yes, the A19/BR30 bulbs can be used in regular household lamps if they're used for plants.
The colour of the light has an amber/pink look to it.
The light colour temperature is 2200 Kelvins.
AIR CONDITIONERS (GENERAL)
A BTU is a British Thermal Unit, and it's a measure of how much energy your air conditioner uses to remove heat from your home in one hour.
Using the NOMA iQ™ app, you can control the Temperature Settings, Fan Speed and Swing of your Portable AC.
Using the NOMA iQ™ app, you can control the Temperature Settings and Fan Speed Settings of your Window AC.
Yes, you can pair multiple ACs to your mobile app. You can create a Group and add your ACs to the Group in order to control multiple ACs at a time.
NOMA iQ™ app allows you to create automated schedules or routines through a feature called Experiences. You can configure Experiences to run your ACs during your desired custom schedules (ex: every weekday from 11:00 p.m. to 7:00 a.m.) with the desired AC settings (Temperature, Fan Speed, etc.).
Yes, you can pair your ACs to Google Assistant and Amazon Alexa and control the ACs using your voice.
To pair your ACs to these Voice Assistants, open the NOMA iQ™ app, click on the Voice Assistants option in the Menu on the top left corner and follow the instructions in the app.
Once paired, you can control your ACs using your voice.
PORTABLE AIR CONDITIONER
In the event of a power outage, the device will automatically restart to its original state once power is restored.
The highest temperature that can be set is 30°C (86°F), and the lowest temperature that can be set is 16°C (60°F).
Please refer to the User Manual for instructions on how to store your portable air conditioner unit.
1. Drain the water completely. See "Draining the Air Conditioner“ in User Manual.
2. Run the air conditioner set to Fan Only for approximately 12 hours to dry the air conditioner.
3. Unplug the air conditioner.
4. Remove the flexible exhaust hose and store with the air conditioner in a clean, dry area. See "Installation Instructions".
5. Remove the window kit and store with the air conditioner in a clean, dry area. See "Installation Instructions".
6. Remove the filter and clean. See "Cleaning the Air Filter".
7. Clean the outside of the air conditioner. See "Cleaning the Outside".
8. Reinstall the filter.
9. Remove the batteries and store the remote control with the air conditioner upright in a clean, dry area.
Check the filter every 2 weeks to see if it needs cleaning.
Note: Do not operate the air conditioner without a filter in place.
1. Turn off the air conditioner.
2. Open the upper and lower back panels. Grasp the centre of the filter and pull it up and out.
3. Clean the air filter with a vacuum cleaner. If the air filter is very dirty, clean it in warm water with a mild detergent. Do not clean the air filter or use any chemical cleaner in the dishwasher. Thoroughly air dry the filter before replacement to ensure maximum efficiency.
4. Install the air filter back into the air conditioner and close the upper and lower back panels.
SACC stands for Seasonal Adjusted Cooling Capacity and is the standard for portable air conditioners. It is a rating in BTU/hour that represents the weighted average performance of a portable AC in a number of test conditions, some of which may be more extreme than the average use case, which is then adjusted to account for the effect of infiltration air and duct heat transfer.
Previously, portable ACs were rated similarly to other styles of air conditioners using the ASHRAE standard. As there is a difference between stationary and portable units, SACC was introduced to better reflect the energy efficiency of each model. While the SACC BTUs are lower than the previous ASHRAE BTUs, the models remain unchanged.
1. Fan: Only the fan runs without cooling. The fan speed can be adjusted from low, medium and high.
2. Dry: Dries the room to reduce the humidity. The AC automatically selects the temperature and low fan speed.
3. Cool: Cools to reduce the room temperature. The fan speed can be adjusted from low, medium or high.
It is entirely normal for your air conditioning unit to produce a little bit of water during routine functioning. This water is stored in the portable AC’s water tank. If you notice water dripping out of your portable AC, please ensure that the drain plugs are properly sealed/plugged.
1. Initial Setup
When the device is first plugged in, the display will show “77” indicating that the unit is in pairing mode (if it is not displaying “77”, please go to step 5). In order to pair the device, please enable and give permission for Locations Services and Bluetooth on your mobile device. In the NOMA iQ app, select the “+” symbol in the top right hand corner. Select the device and follow the instructions within the app.
2. Pre-Connected Network
If any pre-connected WiFi network is found, the device will connect automatically and the device status in the NOMA qi app will be updated.
3. No Pre-Connected Network
If no pre-connected WiFi network is found, make sure the device is in pairing mode (see step 5). Once connected, the device status in the NOMA iQ app will be updated.
4. No Network Found
If no WiFi network is found after 5 minutes during the pairing process, the WiFi function will automatically turn off and the display will show the room temperature. The unit can still be used with the control panel or remote control.
5. Reset WiFi Connection/Pairing Mode
To reset your WiFi connection or to set the device to pairing mode, press the "SWING" button on the remote control 6 times (each press will yield a beep). Wait 2 seconds for the display on the control panel to show "77" indicating that the device is in pairing mode. In order to pair the device, please enable and give permission for Locations Services and Bluetooth on your mobile device. In the NOMA iQ app, select the “+” symbol in the top right hand corner. Select the device and follow the instructions within the app.
6. No Cloud Connection
If the Cloud is down or WiFi signal drops, the device cannot connect to the cloud; the device status in the NOMA iQ app will show as offline.
7. Power Cycle or Outage
Once a connection has already been established, in the event of a power outage, the unit will restart once power is restored. If the unit is unplugged, plug the device back in and the device will connect to the pre-connected network. If the device has not been paired, upon power up it will go to Initial Setup (see Step 1).
NOTE: While the device is in pairing mode and the display shows “77”, the control panel display, buttons and LEDs will be inoperative for 5 minutes if unpaired. Please pair the device as mentioned in step 1, or if the device is to be used without smart control, please use the remote to control the device while ensuring it’s pointed at the receiver. After 5 minutes if unpaired, the display will show the room temperature and the device can be controlled by remote control or control panel.
*KEEP REMOTE IN A SECURE LOCATION AS IT’S REQUIRED FOR PAIRING.
WINDOW AIR CONDITIONER
It is recommended to store the window air conditioner indoors during the winter.
Check the filter every 2 weeks to see whether it needs cleaning.
NOTE: Do not operate the air conditioner without the filter in place.
1. Turn off the air conditioner.
2. Open the front panel. Grasp the centre of the filter and pull up and out.
3. Use a vacuum cleaner to clean the air filter. If the air filter is very dirty, wash it in warm water with a mild detergent. Do not wash the air filter in the dishwasher or use any chemical cleaners. Air dry the filter completely before replacing to ensure maximum efficiency.
4. Replace the air filter back into the air conditioner, and close the front panel.
Please refer to the User Manual for instructions.
1. Run the air conditioner set to Fan Only for approximately 12 hours to dry the air conditioner.
2. Unplug the air conditioner.
3. Remove all accessories and store with the air conditioner in a clean, dry area. See "Installation Instructions“ in User Manual.
4. Remove the filter and clean. See "Cleaning the Air Filter".
5. Clean the air conditioner. See "Cleaning the Front Panel".
6. Reinstall the filter.
7. Remove the batteries and store the remote control with the air conditioner upright in a clean, dry area.
The 10,000 and 12,000 BTU units have the same dimensions. The unit’s exterior dimensions are L x W x D 18 7/8 x 21 7/8 x 14 9/16"
(48 x 55.5 x 37 cm). The window dimensions should be at least larger than L x W: 18 7/8 x 21 7/8" (48 x 55.5 cm).
Yes, it's normal for water to be dripping outside.
The filter can be found in the front panel.
The highest temperature that can be set is 30°C (86°F), and the lowest temperature that can be set is 16°C (60°F).
The serial number can be found on a label on the window AC unit. The label is located on the top of the AC unit.
In the event of a power outage, the device will automatically restart to its original state once power is restored.
1. Fan: Only the fan runs without cooling. The fan speed can be adjusted from low, medium and high.
2. Dry: Dries the room to reduce the humidity. The AC automatically selects the temperature and low fan speed.
3. Cool: Cools to reduce the room temperature. The fan speed can be adjusted from low, medium or high.
4. Eco: Eco cools the room while saving energy. This mode slowly runs your AC compressor, which reduces the pressure in the condenser and allows the motor to consume less energy to run the unit.
When the device is plugged in, the WiFi LED will flash slowly indicating that the unit is in pairing mode. In order to pair the device, please enable and give permission for Locations Services and Bluetooth on your mobile device. In the NOMA iQ app, select the “+” symbol in the top right hand corner. Select the device and follow the instructions within the app.
2. Pre-Connected Network
If any pre-connected WiFi network is found, the device will connect automatically and the WiFi LED will remain lit.
3. No Pre-Connected Network
If no pre-connected WiFi network is found, make sure the device is in pairing mode (see step 5). Once connected, the WiFi LED will remain lit.
4. No Network Found
If no WiFi network is found after 5 minutes during the pairing process, the WiFi function will automatically turn off and the WiFi LED will turn off. The unit can still be used with the control panel or remote control.
5. Reset WiFi Connection/Pairing Mode
To reset your WiFi connection or to set the device to pairing mode, press and hold the "CONNECT" icon on the control panel until the WiFi LED starts flashing indicating that the device is in pairing mode. In order to pair the device, please enable and give permission for Locations Services and Bluetooth on your mobile device. In the NOMA iQ app, select the “+” symbol in the top right hand corner. Select the device and follow the instructions within the app.
6. No Cloud Connection
If the Cloud is down or WiFi signal drops, the device cannot connect to the cloud; the WiFi LED will turn off.
7. Power Cycle or Outage
Once a connection has already been established, in the event of a power outage, the unit will restart once power is restored. If the unit is unplugged, plug the device back in and the device will connect to the pre-connected network. If the device has not been paired, upon power up it will go to Initial Setup (see Step 1).
PRIVACY